
Plantar fasciitis sucks – how to manage it
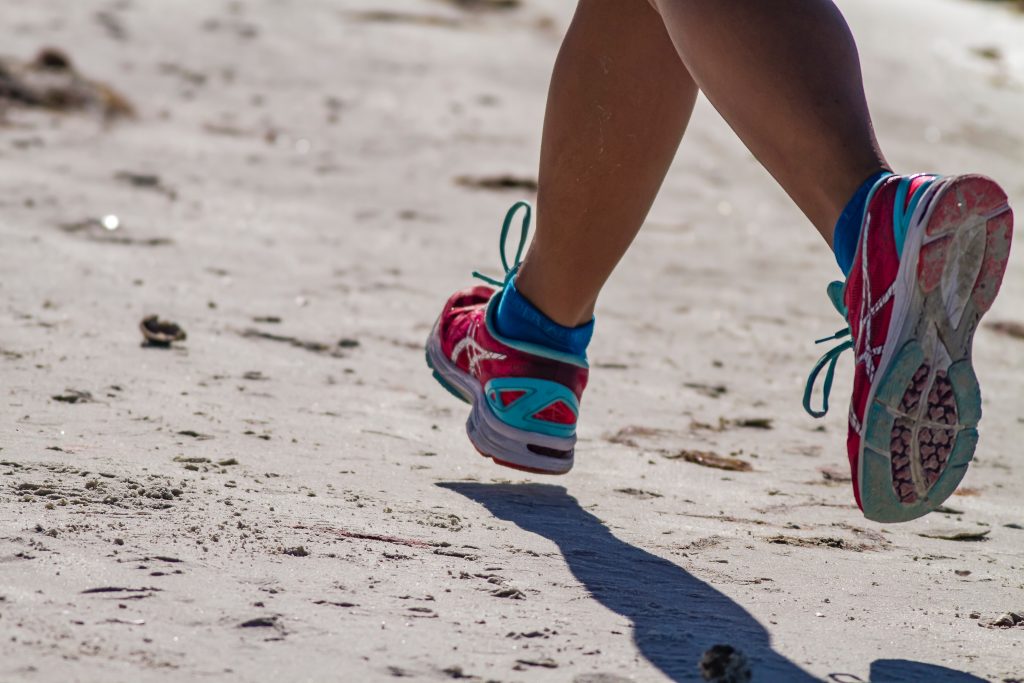
As one of the most common running injuries, plantar fasciitis can have a debilitating effect on your performance. This condition leads to inflammation of the tissue band under the foot, causing significant discomfort and even debilitating injury. Plantar fasciitis sucks – how do you manage it?
The good news is that it’s relatively easy to treat by doing specific plantar fasciitis stretches and exercises, as well as getting ample rest. The pain caused by plantar fasciitis can sometimes ease while exercising, so, it may be tempting for you to ignore it or put off treatment until a later date. However, without proper treatment and recovery, the condition may become chronic, which ultimately could lead to foot, knee, hip, or back problems. It’s important not only to alleviate symptoms but also to address the causative factors or this condition will reoccur.
Let’s take a closer look at this common foot injury, the causes, and seven stretches and exercises designed to relieve plantar fasciitis pain and help get you back to running.
Loneliness of the Covid Run
The Causes of Plantar Fasciitis
The plantar fascia is the name of the bowstring-shaped band of tissue that runs from the toes to the heel. It acts as a shock absorber when you walk or run and supports the arch of your foot. Subjecting it to too much stress can cause tiny tears in the tissue. If this happens repeatedly, the tissue can become inflamed or irritated, causing heel pain. Some people who develop fasciitis pain also find it challenging to raise their toes when sitting or standing.
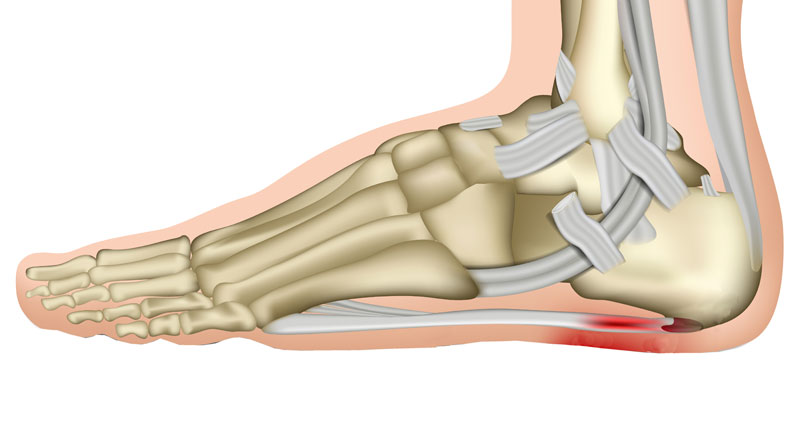
You would usually feel it as a sharp pain that stabs when you take your first steps a night’s sleep or long rest. The pain usually decreases during activity, but then returns after a period of inactivity.
Causes that athletes should pay attention to include:
- Overstretching the sole of the foot
- Being new to exercising on a hard floor
- Wearing shoes that don’t provide enough support or cushioning
- Increasing the amount of standing, walking, or running
- Exercising when your heel or calf is tight
In addition to these causes, plantar fasciitis can occasionally be a symptom of a larger problem, such as a compressed nerve or a stress fracture.
Pain-Relieving Plantar Fasciitis Stretches and Exercises
The following eight stretches and exercises that can relieve plantar fasciitis pain are those recommended by NHS Ayrshire & Arran. If there is any doubt about your fitness to do these exercises, then please discuss this with your GP.
Exercise 1 : Plantar Fascia Towel stretch
This exercise is aimed at stretching the plantar fascia. To begin place a towel around the ball of the affected foot, keep your heel in contact with the ground and avoid bending your knee. Pull the towel toward you until you feel the stretch in the bottom of your foot and back of your calf muscle. Hold the stretch for 20 seconds and repeat 3 times with a small rest period between stretches.
It is particularly useful to perform the stretch first thing in the morning or after a period of rest.
If you feel this stretching exercise is making your condition worse the please focus on performing the exercises which are marked as strengthening
Exercise 2: Plantar Fascia Wall Stretch
This exercise is aimed at stretching the plantar fascia as well as the calf muscle. Place your hands on a wall for support then wedge the toes of the affected foot against the wall with the foot angled at around 45 degrees. Keep the heel of the affected foot against the ground at all times. Now begin to bend the front knee whilst moving your body towards the wall until you feel a stretch in the back of your calf and bottom of your foot. Hold the stretch for 20 seconds and repeat 3 times with a small rest period between stretches. This stretch can be done with or without shoes on.
If you feel this stretching exercise is making your condition worse the please focus on performing the exercises which are marked as strengthening
Exercise 3: Standing Calf Stretch (Gastrocnemius and Soleus muscles)
(Part 1) Place your hands on a wall for support and take a step back with the affected foot. It is important that the heel of the affected foot remains on the ground throughout this stretch, additionally try to keep the toes of both feet pointing straight towards the wall rather than rotating the foot so that the toes are pointing outwards. Now begin to bend the knee of your front leg whilst moving your chest towards the wall until you feel a stretch in the back of you calf muscle, hold for 20 seconds and repeat 3 times with a small rest period between stretches.
(Part 2)
The second part of this exercise is aimed at stretching the soleus muscle. Adopt the same starting position as you did for the previous exercise. Slide the affected foot towards the front foot as demonstrated. This time when bending the front knee also bend the knee of the back leg until you feel a stretch deeper in the calf muscle. Hold this for 20 seconds and repeat 3 times. As before be sure to keep your heels in ground contact throughout the stretch.
If you feel this stretching exercise is making your condition worse the please focus on performing the exercises which are marked as strengthening
Exercise 4: Standing Heel Raises
This exercise is aimed at strengthening the muscle in your calf and foot. To perform this exercise stand close to a wall, placing your hands against the wall for balance. Raise up slowly onto your tip toes lifting both heels off the ground, when you have raised the heels up up as far as you are comfortable with begin to slowly lower the heels back down to the ground. Strengthening exercises should be built up gradually over a period of weeks, so to begin with do as many repetitions as you can manage.
The aim is to do 3 sets of around 10 -15 repetitions but remember it may take you several weeks before you are able to reach close to this target.
Exercise 5: Plantar Fascia Loading Exercise (High Load Exercise)
This exercise is aimed at strengthening the muscles in the foot. Place a folded-up towel on the floor as is seen in the video. Place the toes of the affected foot against the folded edge of the towel in a flexed position. Try to have your toes flexed up as far as you can comfortably manage. Now begin to raise up onto your tip toes lifting your heel off the ground. Try to raise up onto the tip toes for a count of around 3 seconds, pause at the top for 2 seconds then slowly lower the heel back down to the ground for a count of 3 seconds.
Perform this exercise every second day.
Strengthening exercises should be built up gradually over a period of weeks, so to begin with do as many repetitions as you can manage. The aim is to do 3 sets of around 12 repetitions but remember it make take you several weeks before you are able to reach close to this target.
Exercise 6: Intrinsic Towel Strengthening Exercise
This exercise is aimed at strengthening the small intrinsic muscles in the foot. Place a small towel flat on the ground. This exercises is performed in a seated position make sure your back is straight and leg bent comfortably at 90 degrees with your affected foot placed flat on the towel. Use your toes to begin crunching the towel up with the aim of pulling the towel in towards you, do this in a slow controlled manner. When you have pulled the towel in as far as possible straighten it back out again and repeat the process between 3-5 times. Make sure your heel stays in ground contact throughout the exercise.
Exercise 7: Intrinsic Thera-band Strengthening Exercise
This exercise is aimed at strengthening the small intrinsic muscle in the foot. This exercise is performed in a seated position make sure your back is straight and leg bent comfortably at 90 degrees with your affected foot placed flat on a strip of thera-band. Pull the end of the band over your knee towards you which in turn will pull your toes up into a flexed position. Anchor the band on your thigh maintaining a good level of tension on the band throughout the exercise. Hold the band tight and begin to slowly push your toes down towards the ground against the resistance of the band, when your toes reach the ground allow them to slowly raise back up to their starting position.
Aim to do 3 sets of around 20 repetitions. You can adjust the difficulty of the exercise by creating more or less tension on the band. Make sure your heel stays in ground contact throughout the exercise.
Exercise 8:- Cold therapy
This exercise is an effective way of massaging your plantar fascia. Fill a small bottle with water until it is around ¾ of the way full and place in the freezer until the water is frozen. Place the bottle of water on the ground then place your affected foot on top of the bottle. Begin slowly rolling your foot over the bottle from your heel to your toes and back again. Apply as much pressure as you are comfortable with and continue rolling back and forth for around 5 minutes.
Prevention Is Better Than Cure
Although nothing can guarantee that you will never develop plantar fasciitis, there are actions that you can take to minimize the risk of being affected by this condition. In addition to the stretches and strength exercises above, one effective way to mitigate plantar fasciitis is to maintain a healthy weight, which is relatively easy if you are a regular runner. Another is to replace old athletic shoes worn out with a pair that offer the best cushioning and support. The right shoes will protect against impact and reduce the chances of heel pain.
While stretching, maintaining a healthy weight, and wearing the right shoes can all work together to make you injury-proof, there are some cases where you will need to seek medical assistance. If the condition hasn’t improved after two weeks of at-home treatment, seek the advice of a doctor or specialist so you can get back to training quickly and painlessly.